
Host on Cloudflare
Use these instructions to enable continuous deployment from a GitHub repository. The same general steps apply for other Git providers such as GitLab or Bitbucket.
Do not commit the contents of the publishDir directory to your repository. Hugo recreates this directory when you build your project.
Prerequisites
Please complete the following tasks before continuing:
- Create a Cloudflare account.
- Log in to your Cloudflare account.
- Create a GitHub account.
- Log in to your GitHub account.
- Create a GitHub repository for your project.
- Create a local Git repository for your project with a remote reference to your GitHub repository.
- Create a Hugo project within your local Git repository and test it with the
hugo servercommand. - Commit the changes to your local Git repository and push to your GitHub repository.
Procedure
- Step 1
- Create a
wrangler.jsoncfile in the root of your project.wrangler.jsonc{ // Set this to the name of your project. "name": "test", // Set this to today's date in YYYY-MM-DD format. "compatibility_date": "2026-06-19", "build": { "command": "chmod a+x build.sh && ./build.sh" }, "assets": { "directory": "./public", "not_found_handling": "404-page" } } - Step 2
- Create a
build.shfile in the root of your project, adjusting the tool versions and time zone as needed.build.sh#!/usr/bin/env bash #------------------------------------------------------------------------------ # @file # Builds a Hugo project hosted on a Cloudflare Worker. #------------------------------------------------------------------------------ # Exit on error, undefined variables, or pipe failures set -euo pipefail # Define tool versions DART_SASS_VERSION=1.101.0 GO_VERSION=1.26.4 HUGO_VERSION=0.164.0 NODE_VERSION=24.18.0 # Set the build time zone TZ=Europe/Oslo # Set the build cache directory HUGO_CACHEDIR="${PWD}/.cache/hugo" # Perform cleanup cleanup() { if [[ -n "${build_temp_dir:-}" && -d "${build_temp_dir}" ]]; then rm -rf "${build_temp_dir}" fi } # Register the cleanup trap trap cleanup EXIT SIGINT SIGTERM main() { # Export the build time zone export TZ # Export the build cache directory export HUGO_CACHEDIR # Create a temporary directory for downloads build_temp_dir=$(mktemp -d) # Create a local tools directory mkdir -p "${HOME}/.local" # Install Dart Sass echo "Installing Dart Sass ${DART_SASS_VERSION}..." curl -sfL --output-dir "${build_temp_dir}" -O "https://github.com/sass/dart-sass/releases/download/${DART_SASS_VERSION}/dart-sass-${DART_SASS_VERSION}-linux-x64.tar.gz" tar -C "${HOME}/.local" -xf "${build_temp_dir}/dart-sass-${DART_SASS_VERSION}-linux-x64.tar.gz" export PATH="${HOME}/.local/dart-sass:${PATH}" # Install Go if [[ -f "go.mod" ]]; then echo "Installing Go ${GO_VERSION}..." curl -sfL --output-dir "${build_temp_dir}" -O "https://go.dev/dl/go${GO_VERSION}.linux-amd64.tar.gz" tar -C "${HOME}/.local" -xf "${build_temp_dir}/go${GO_VERSION}.linux-amd64.tar.gz" export PATH="${HOME}/.local/go/bin:${PATH}" fi # Install Hugo echo "Installing Hugo ${HUGO_VERSION}..." curl -sfL --output-dir "${build_temp_dir}" -O "https://github.com/gohugoio/hugo/releases/download/v${HUGO_VERSION}/hugo_${HUGO_VERSION}_linux-amd64.tar.gz" mkdir -p "${HOME}/.local/hugo" tar -C "${HOME}/.local/hugo" -xf "${build_temp_dir}/hugo_${HUGO_VERSION}_linux-amd64.tar.gz" export PATH="${HOME}/.local/hugo:${PATH}" # Install Node.js if [[ -f "package-lock.json" ]]; then echo "Installing Node.js ${NODE_VERSION}..." curl -sfL --output-dir "${build_temp_dir}" -O "https://nodejs.org/dist/v${NODE_VERSION}/node-v${NODE_VERSION}-linux-x64.tar.gz" tar -C "${HOME}/.local" -xf "${build_temp_dir}/node-v${NODE_VERSION}-linux-x64.tar.gz" export PATH="${HOME}/.local/node-v${NODE_VERSION}-linux-x64/bin:${PATH}" fi # Log tool versions echo "Logging tool versions..." command -v sass &> /dev/null && echo "Dart Sass: $(sass --version)" || echo "Dart Sass: not installed" command -v go &> /dev/null && echo "Go: $(go version)" || echo "Go: not installed" command -v hugo &> /dev/null && echo "Hugo: $(hugo version)" || echo "Hugo: not installed" command -v node &> /dev/null && echo "Node.js: $(node --version)" || echo "Node.js: not installed" # Configure Git echo "Configuring Git..." git config --global core.quotepath false # Fetch full Git history if [[ $(git rev-parse --is-shallow-repository) == true ]]; then echo "Fetching full Git history..." git fetch --unshallow fi # Initialize Git submodules if [[ -f .gitmodules ]]; then echo "Initializing Git submodules..." git submodule update --init --recursive fi # Install Node.js dependencies if [[ -f package-lock.json ]]; then echo "Installing Node.js dependencies..." npm ci fi # Build the project echo "Building the project..." hugo build --gc --minify } main "$@" - Step 3
- In your project configuration, change the location of the image cache to the
cacheDiras shown below:caches: images: dir: :cacheDir/images[caches] [caches.images] dir = ':cacheDir/images'{ "caches": { "images": { "dir": ":cacheDir/images" } } }See configure file caches for more information.
- Step 4
- Commit the changes to your local Git repository and push to your GitHub repository.
- Step 5
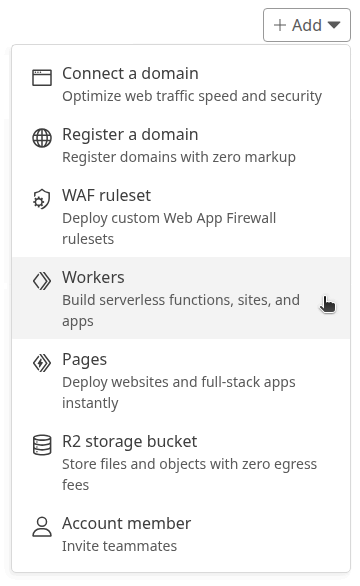
- In the upper right corner of the Cloudflare dashboard, press the Add button and select “Workers” from the drop down menu.
- Step 6
- Verify your account if prompted.
- Step 7
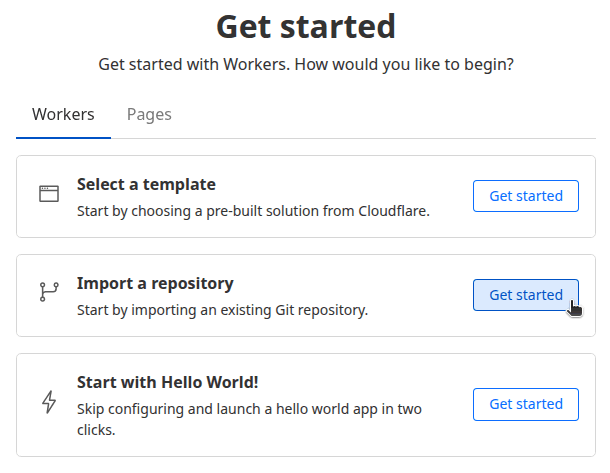
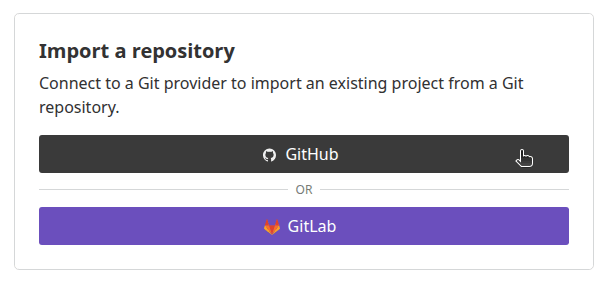
- On the “Create a Worker” page, under the “Ship something new” heading, press the Connect GitHub button.
- Step 8
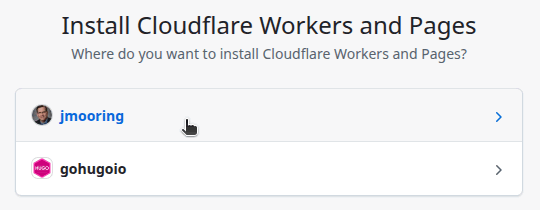
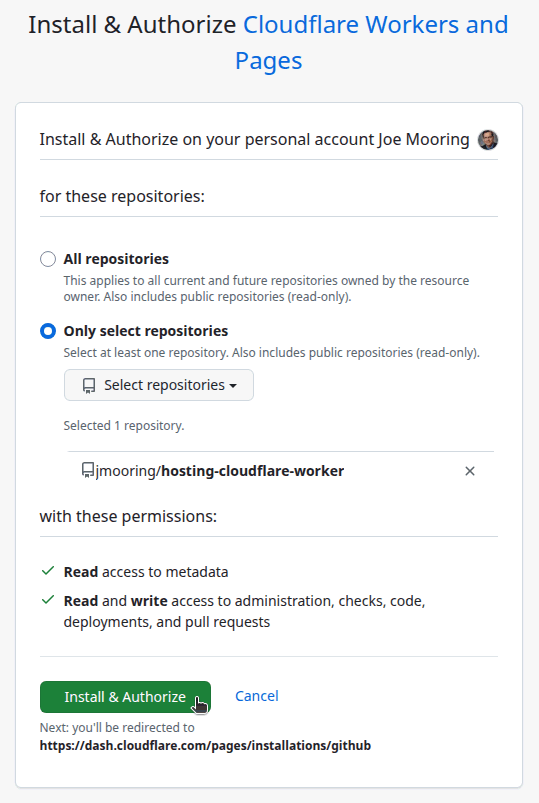
- Select the GitHub account where you want to install the Cloudflare Workers and Pages application.
- Step 9
- Authorize the Cloudflare Workers and Pages application to access all repositories or only select repositories, then press the Install & Authorize button.
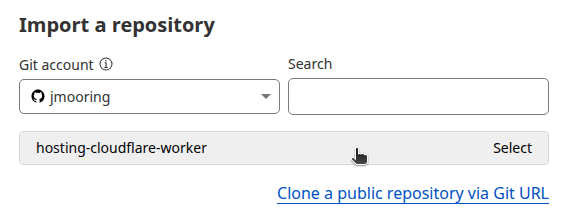
- Step 10
- On the “Create a Worker” page, under the “Select a repository” heading, select the repository to deploy, then press the Next button.
- Step 11
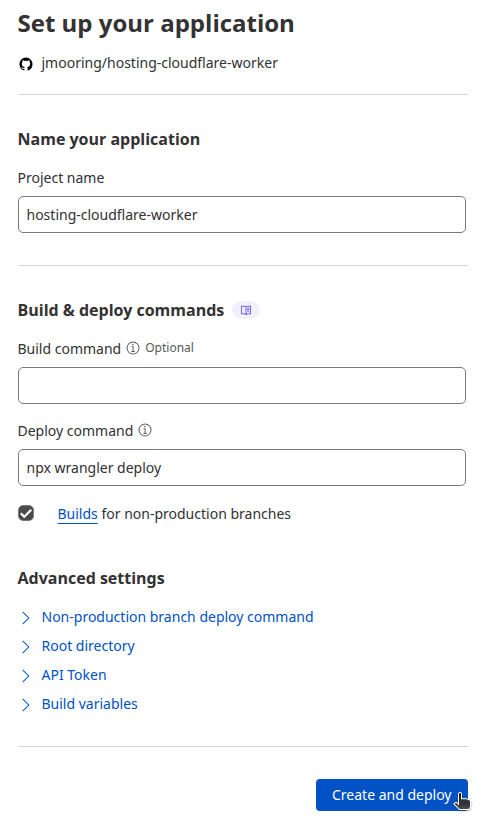
- On the “Create a Worker” page, under the “Set up your application” heading, perform the following steps:
- Provide a Project name.
- Leave the Build command blank and ensure the Deploy command is
npx wrangler deploy. - Expand the Advanced settings panel.
- In the Variable name field, enter
SKIP_DEPENDENCY_INSTALL. - In the Variable value field, enter
true. - Press the Deploy button.
- Step 12
- Wait for the site to build and deploy, then press the Visit button in the upper left corner of your screen.
In the future, whenever you push a change from your local Git repository, Cloudflare will rebuild and deploy your site.
Build cache
The build script shown in Step 2 sets Hugo’s cacheDir to the path required by Cloudflare’s build cache, which is disabled by default. To enable the Cloudflare build cache, you must complete two steps.
First, your project must have both a package.json and package-lock.json file in the project root. If you have only a package.json file, run npm install to create the corresponding package-lock.json file. If your project does not require any Node.js packages, create both files by running npm init -y && npm install.
Second, you must enable the build cache in your project dashboard.
- Navigate to Workers & Pages Overview on the dashboard.
- Find your Workers project.
- Go to Settings > Build > Build cache.
- Press the Enable button.
Scheduled builds
If your site uses resources.GetRemote to fetch external data at build time, that data is embedded in the static HTML when the site is built. Without a scheduled build, the data only refreshes when someone commits code to the repository. To keep content current, you can trigger a rebuild on a schedule by creating a Cloudflare deploy hook and calling it from a GitHub Actions workflow.
- Step 1
- In the Cloudflare dashboard, go to Workers & Pages. Select your project, then navigate to Settings > Builds > Deploy Hooks. Press Create deploy hook, provide a name (e.g.,
github-cron), and copy the generated URL. - Step 2
- In your GitHub repository, go to Settings > Secrets and variables > Actions. Press New repository secret, name it
CLOUDFLARE_DEPLOY_HOOK, paste the deploy hook URL as the value, and save. - Step 3
- Create a GitHub Actions workflow file in your repository..github/workflows/scheduled-cloudflare-deploy.yaml
name: github-cron
on:
  schedule:
    - cron: "42 7 * * *"
      timezone: Etc/UTC

jobs:
  deploy:
    runs-on: ubuntu-latest
    steps:
      - name: Trigger Cloudflare deploy hook
        run: curl -X POST "${{ secrets.CLOUDFLARE_DEPLOY_HOOK }}"
Adjust the
cronexpression to set your desired build schedule. In the example above, the job is scheduled to run every day at 7:42 AM UTC. - Step 4
- Commit the changes to your local Git repository and push to your GitHub repository.
The schedule event can be delayed during periods of high loads of GitHub Actions workflow runs. High load times include the start of every hour. If the load is sufficiently high enough, some queued jobs may be dropped. To decrease the chance of delay, schedule your workflow to run at a different time of the hour, or use a dedicated third-party scheduling service such as Google Cloud Scheduler or cron-job.org.